As part of the on-going VMware article series, earlier we discussed about VMware virtualization fundamentals, and how to install VMware Server 2.
In this article, let us discuss about how to install VMware ESXi.
VMware ESXi is free. However, the software comes with a 60 days evaluation mode. You should register on VMware website to get your free license key to come out of the evaluation mode. Once the ESXi is installed, you can either user vSphere Client on the Direct Console User Interface to administer the host.
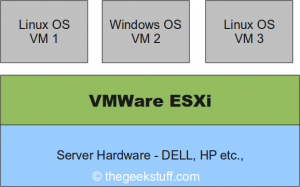
VMware ESXi is based on hypervisor architecture that runs directly on top of a hardware as shown below.

1. Download ESXi server
Get the software from the VMware ESXi download page.Following are the various download options available. Select “ESXi 4.0 Update 1 Installable (CD ISO) Binary (.iso)” and burn a CD.
- ESXi 4.0 Update 1 Installable (CD ISO)
- Upgrade package from ESXi Server 3.5 to ESXi Server 4.0 Update 1
- Upgrade package from ESXi Server 4.0 to ESXi Server 4.0 Update 1
- VMware vSphere Client and Host Update Utility
2. VMware VMvisor Boot Menu
Once you insert the ESXi CD and reboot the server, it will display a boot menu with an option to launch “ESXi Installer” as shown below.
3. VMware ESXi Installer Loading
While the installer is loading all the necessary modules, it will display the server configuration information at the top as shown below. In this example, I was installing VMware ESXi 4.0 on a Dell PowerEdge 2950 server.
4. New ESXi Install
Since this is a new installation of ESXi, select “Install” in the following screen.5. Accept VMware EULA
Read and accept the EULA by pressing F11


